Client Download
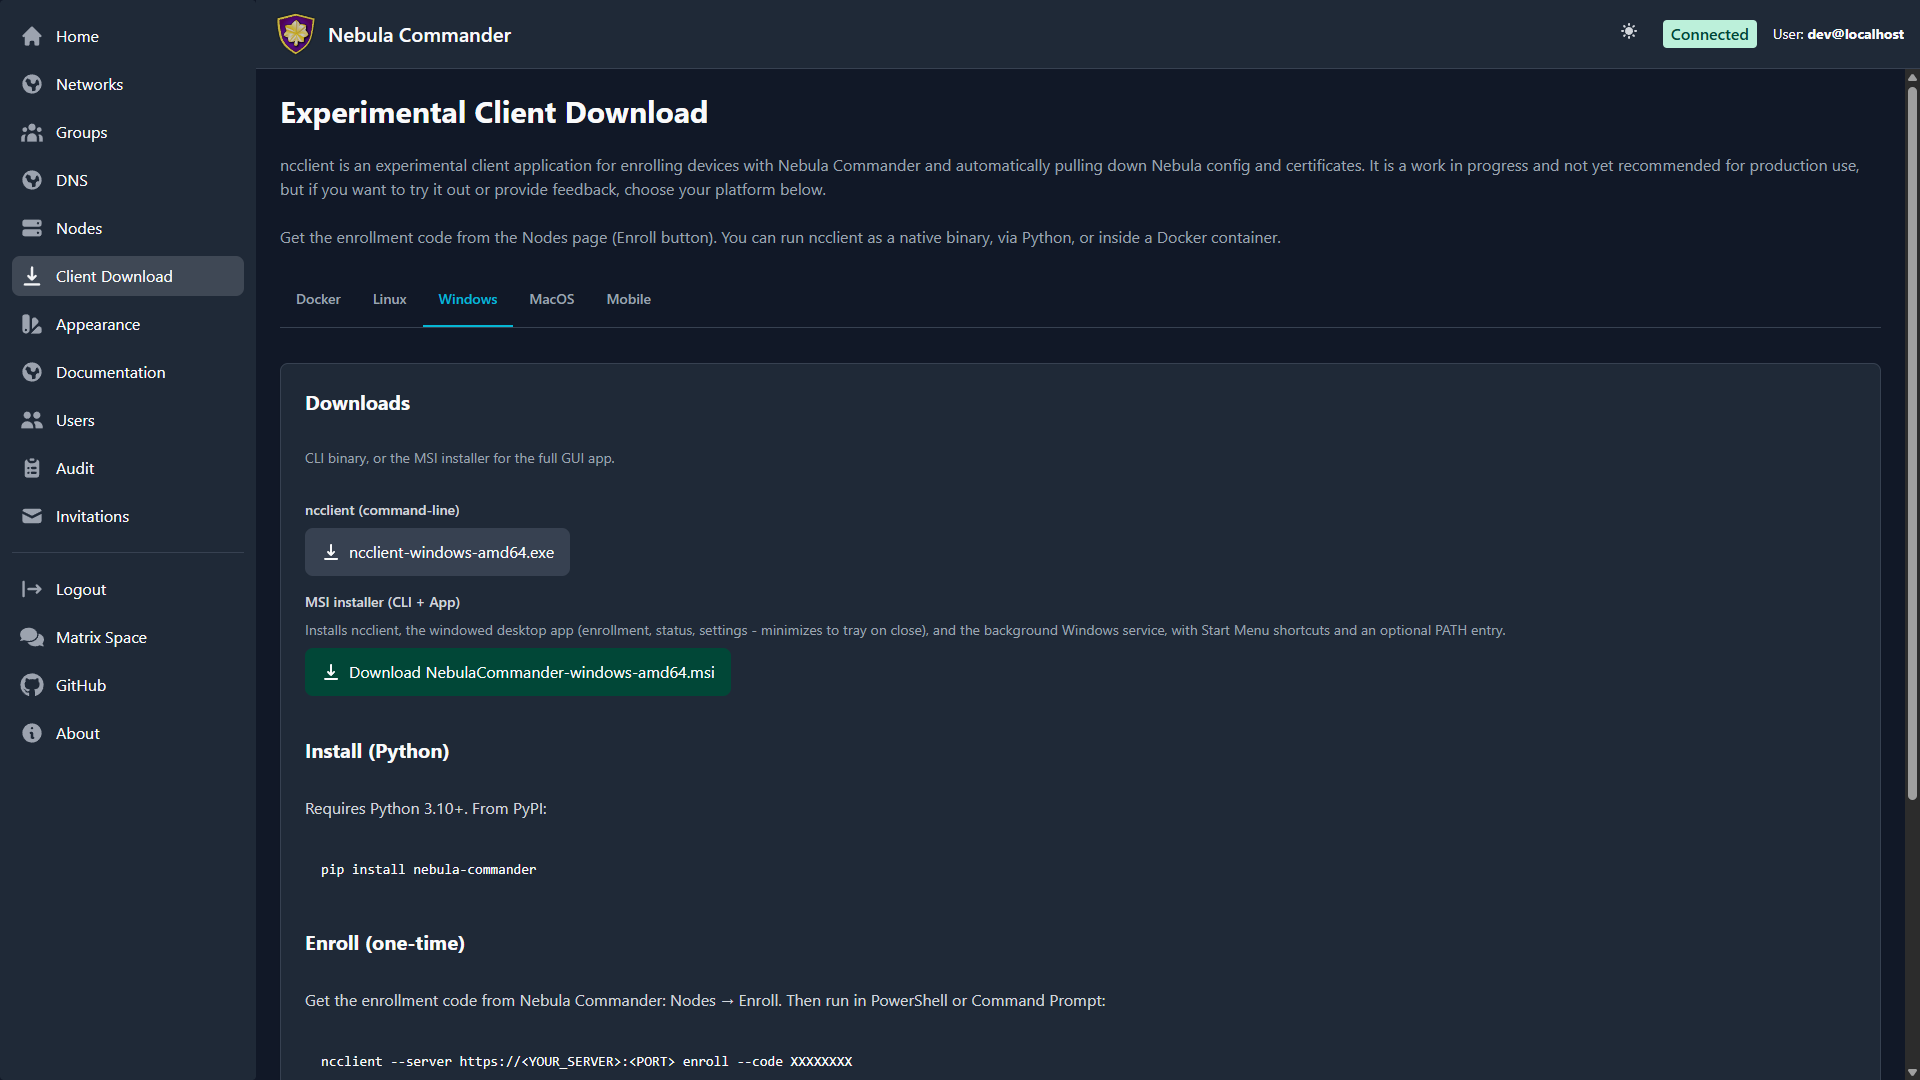
The Client Download page (also reachable from the sidebar or at /client-download) lets users download ncclient binaries served directly from your Nebula Commander instance. No internet access to GitHub is required after deployment.
| Light | Dark |
|---|---|
 |  |
Purpose
Install and run ncclient on a device to enroll with Nebula Commander and pull config and certificates. The enrollment code is obtained from the Nodes page (Enroll button for the node). The page is organized into tabs (Docker, Linux, Windows, macOS, Mobile) and provides the CLI for every platform, the Linux desktop app packages, and the Windows installer. Commands on the page are filled in with this instance’s own URL, so they can be pasted as-is.
CLI binaries (command-line ncclient)
Pre-built executables for:
| Platform | File name |
|---|---|
| Linux x86_64 | ncclient-linux-amd64 |
| Linux ARM64 | ncclient-linux-arm64 |
| Windows x86_64 | ncclient-windows-amd64.exe |
| macOS Intel | ncclient-macos-amd64 |
| macOS Apple Silicon | ncclient-macos-arm64 |
Downloads are served from /downloads/ (e.g. /downloads/ncclient-linux-amd64). These binaries are only available if the frontend was built with client binaries included (e.g. Docker image built with DOWNLOAD_BINARIES=1). If the page shows no downloads or 404, use ncclient installation from releases or pip instead.
After download on Linux or macOS, make the file executable and place it on your PATH:
chmod +x ncclient-linux-amd64   # or the file you downloaded
# Move to /usr/local/bin or add the directory to PATH
On Windows, add the directory containing ncclient-windows-amd64.exe to your PATH or run it by full path.
Linux desktop app packages
The Linux tab leads with the package repository at pkgs.nebulacommander.com, the recommended install for Linux nodes other than lighthouses because it’s what enables automatic updates. It also offers the packages for direct download, in both .deb and .rpm form, plus a Flatpak:
| File | Contents |
|---|---|
nebula-commander-client.deb / .rpm | The ncclient CLI |
nebula-commander-service.deb / .rpm | The ncclient systemd service and the D-Bus/polkit integration the app uses |
nebula-commander-desktop.deb / .rpm | The GTK4 desktop app |
org.beardedtek.NebulaCommander.flatpak | The desktop app only; still needs nebula-commander-service installed on the host |
Install all three together so the package manager resolves the order:
sudo apt install ./nebula-commander-client.deb ./nebula-commander-service.deb ./nebula-commander-desktop.deb
# or
sudo dnf install ./nebula-commander-client.rpm ./nebula-commander-service.rpm ./nebula-commander-desktop.rpm
The tab then shows the two remaining steps: start the service (sudo systemctl enable --now ncclient), then enroll in the desktop app or with sudo ncclient enroll.
For distributions the packages don’t cover, the tab’s Standalone binary or pip (advanced) section shows the binary downloads and a root-owned pip install, followed by the Linux setup order: enroll as root, sudo ncclient install, then check systemctl status ncclient.
Windows installer
The Windows tab offers the CLI on its own and the MSI installer (/downloads/NebulaCommander-windows-amd64.msi). The MSI installs the CLI, the Windows app, and a background Windows Service together, and can add them to PATH. The service does the actual work (polling, running Nebula, split-horizon DNS) as LocalSystem, so nothing here needs an admin prompt after installation.
The standalone app and service executables (NebulaCommanderApp-windows-amd64.exe, ncclient-service-windows-amd64.exe) are published on GitHub Releases but not on this page. They’re mainly for development: the service is only ever registered by the MSI, so for normal use install the MSI.
Getting the enrollment code
- In the Web UI, go to Nodes.
- Open the node for this device (or create one and create/sign a certificate).
- Click Enroll and copy the one-time code.
- On the device:
- Windows MSI or Linux desktop app: open Nebula Commander, go to the Enrollment tab, and enter the server URL and code. The service picks it up automatically.
- Linux service package, no desktop:
sudo ncclient enroll --server https://YOUR_SERVER_URL --code XXXXXXXX(start the service first withsudo systemctl enable --now ncclient). - Linux standalone binary or pip: follow Linux setup: enroll as root, then
sudo ncclient install. - Docker: set
ENROLL_CODEin the compose file. - macOS and the plain Windows CLI:
ncclient enroll --server https://YOUR_SERVER_URL --code XXXXXXXX, thenncclient runto start polling for config and certs.
See ncclient usage for full steps for each client, including how to re-enroll.